
Ultimate low cost media server
New update, new full time job, new home, university over and the same Raspberry Pi as before has gone through a bit of a makeover.
It is now running a ARM version of Proxmox as a HyperVisor, and allows to run independent LXC containers which in each would run a selection of docker services. The main goal is to be able to transfer the LXC containers from one machine to another when that time comes.
I wanted to see how far I can push the Raspberry Pi (4, 8GB version) in streaming media to my devices. Since moving to my new place, the Raspberry Pi has been downclocked to save on watts and power bills, without losing much if any performance. Especially as my main server has been down until research goes into lowering the wattage on something like that.
Tutorial
What do I need?
- Raspberry Pi 4 running Proxmox 8.1.7 (Any OS can be used though)
- Docker & Compose Installed
- Syncthing to sync media
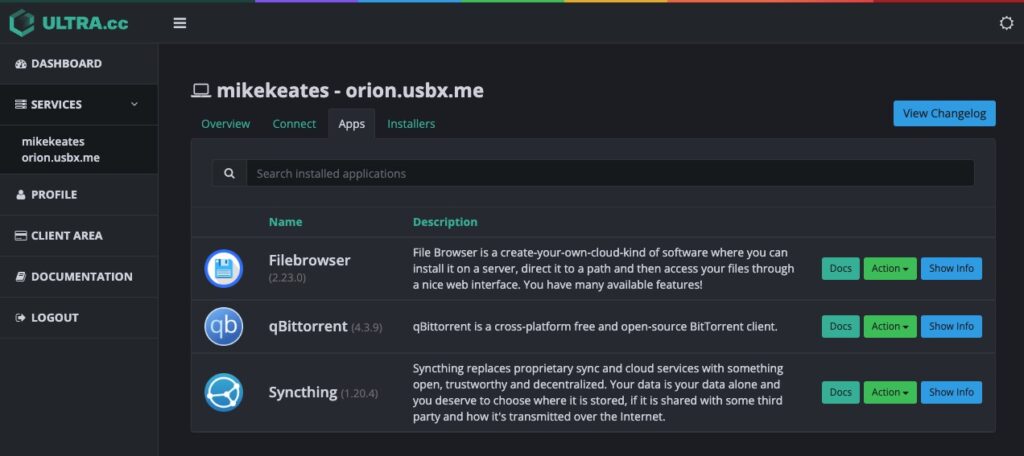
- ULTRA.cc
This tutorial won’t go through the process of installing the required software, but will concentrate on connecting them together for the purpose of this tutorial. In addition to try keep using resources to a minimum, the services needed would be running remotely and not on the device itself, except for the minimum which are Jellyfin, Syncthing & Lidarr (there is no feature to request music at the time of typing this tutorial).
What is the plan?
- To have the Raspberry Pi to have a LXC container running Jellyfin as the media player along with services such as the ‘RARR’ apps using Docker
- Connect the services to a outside source to download media using ULTRA.cc
Docker Compose
Download the Raspberry Pi OS Lite version from the Raspberry Pi offical software page as well as the Raspberry Pi Imager software to flash the downloaded image to a SD card to be used in the Raspberry Pi.
Make sure to click on the ‘Gear’ button on the bottom left of the Imager to enable SSH so you can remotely access the Pi. If you have a monitor and keyboard connected to the Pi you can skip this step.
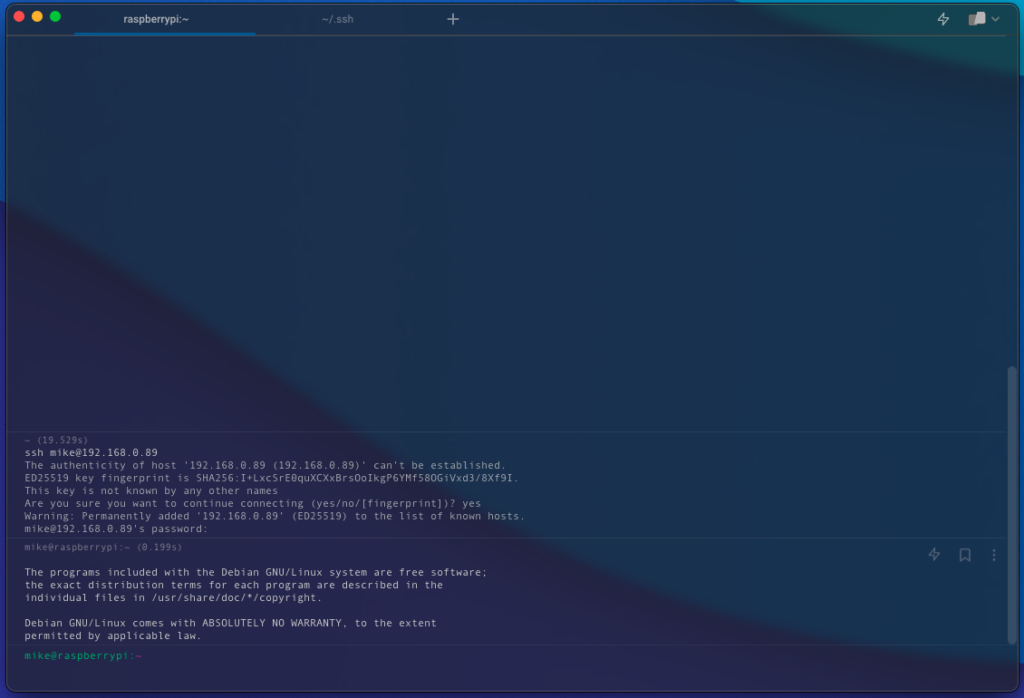
Then flash the image to the SD card, wait for it to complete and insert the card into your Raspberry Pi and start it up. To remotely access the Raspberry Pi need to input the following code into your terminal. Replace ‘USER’ with the username you set and ‘IPADDRESS’ with the IP address that your Raspberry Pi has been assigned. You can easily find out by accessing your router.
version: '3.5'
services:
  jellyfin:
    image: jellyfin/jellyfin
    container_name: jellyfin
    user: 1000:1000
    network_mode: 'host'
    volumes:
      - /mnt/docker/jellyfin/jellyfin/config:/config
      - /mnt/docker/jellyfin/jellyfin/cache:/cache
      - type: bind
        source: /mnt/media/
        target: /media
    restart: 'unless-stopped'
    # Optional - alternative address used for autodiscovery
    # environment:
    #  - JELLYFIN_PublishedServerUrl=http://example.com
    # Optional - may be necessary for docker healthcheck to pass if running in host network mode
    # extra_hosts:
    #  - 'host.docker.internal:host-gateway'

  # Indexer/Manager
  prowlarr:
    image: ghcr.io/linuxserver/prowlarr:develop
    container_name: prowlarr
    environment:
      - PUID=1000
      - PGID=1000
      - TZ=Europe/London
    volumes:
      - /mnt/docker/jellyfin/prowlarr/config:/config
    # network_mode: "host"
    ports:
      - 9696:9696
    restart: unless-stopped

  # Movies
  radarr:
    image: linuxserver/radarr:latest
    container_name: radarr
    environment:
      - PUID=1000
      - PGID=1000
      - TZ=Europe/London
    volumes:
      - /mnt/docker/jellyfin/radarr/config:/config
      - /mnt/media/movies:/movies
    ports:
      - 7676:7878
    restart: unless-stopped

  # TV Series
  sonarr:
    image: ghcr.io/linuxserver/sonarr:latest
    container_name: sonarr
    environment:
      - PUID=1000
      - PGID=1000
      - TZ=Europe/London
      - DOCKER_MODS=ghcr.io/gilbn/theme.park:sonarr
      - TP_THEME=organizr
    volumes:
      - /mnt/docker/jellyfin/sonarr/config:/config
      - /mnt/media/series:/series
    ports:
      - 7878:7878
      - 8989:8989
    restart: unless-stopped

  # Music
  lidarr:
    image: lscr.io/linuxserver/lidarr:latest
    container_name: lidarr
    environment:
      - PUID=1000
      - PGID=1000
      - TZ=Europe/London
    volumes:
      - /mnt/docker/jellyfin/lidarr/config:/config
      - /mnt/media/music:/music
    ports:
      - 8686:8686
    restart: unless-stopped

  # File synchronization program
  syncthing:
    image: syncthing/syncthing
    container_name: syncthing
    hostname: my-syncthing
    environment:
      - PUID=1000
      - PGID=1000
    volumes:
      - /mnt/docker/jellyfin/syncthing:/var/syncthing
    ports:
      - 8384:8384 # Web UI
      - 22000:22000/tcp # TCP file transfers
      - 22000:22000/udp # QUIC file transfers
      - 21027:21027/udp # Receive local discovery broadcasts
    restart: unless-stopped

  # Updater
  watchtower:
    container_name: watchtower
    image: containrrr/watchtower
    volumes:
      - /var/run/docker.sock:/var/run/docker.sock
      - /root/.docker/config.json:/config.json
If you get a ‘Identification has changed!’ error, just connect again and it should allow you to update the key to remotely access the Pi.
Once connect, it is always good practice to update the package list as well as upgrade any that is out of date.
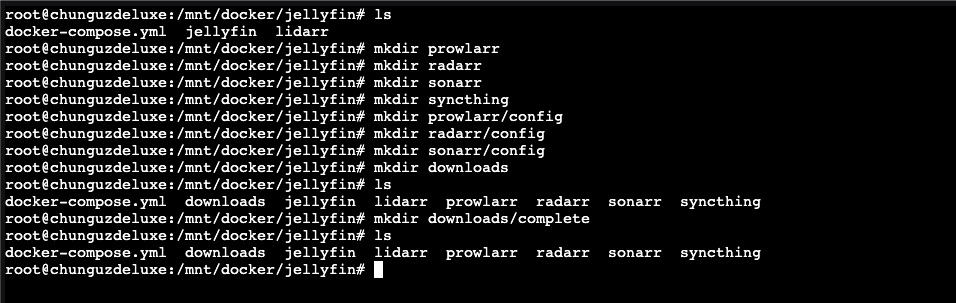
# run from outside the main directory such as /mnt/docker/jellyfin
chown -R root:root jellyfin
chmod -R 777 jellyfin
Once completed, it is important to confirm that the ‘curl’ and ‘lib-release’ packages are available to perform the next task.
sudo docker compose up -dAdding the Cloudflare Repository
For the next task, a GPG key is needed to verify the packages are valid when being installed from the Cloudflared repository and finally stored on the Raspberry Pi itself.
#Jellyfin Access
http://IPADDRESS:8096
#Prowlarr Access
http://IPADDRESS:9696
#Radarr Access
http://IPADDRESS:7676
#Sonarr Access
http://IPADDRESS:8989
#Lidarr Access
http://IPADDRESS:8686
#Syncthing Access
http://IPADDRESS:8384
UltraCC Setup
Now it is time to install the Cloudflared package to the Pi.
sudo apt install cloudflaredqBittorrent
Now it is time to set up a Cloudflare tunnel, which is much easier than a year ago when I set one up on the unRaid server. So to begin by authenticating with the Cloudflare service by using the command below. Ensure that Cloudflared is open on the Pi while the process is completed.
cloudflared tunnel login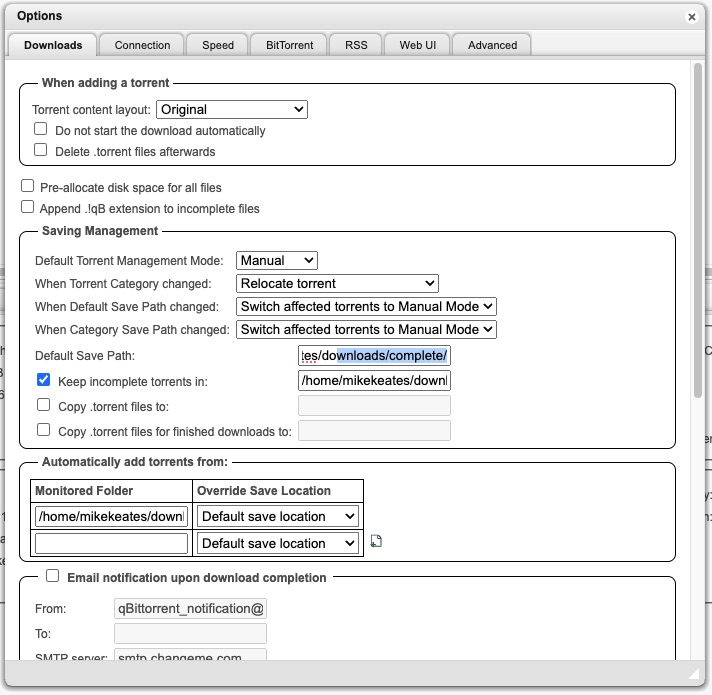
After running the command and seeing the image above, the following message will appear. You will need to go the the URL to login to your Cloudflare account.
Please open the following URL and log in with your Cloudflare account:

https://dash.cloudflare.com/argotunnel?callback=https%3A%2F%2Flogin.cloudflareaccess.org%2FXXXXXXXXXX

Leave cloudflared running to download the cert automatically.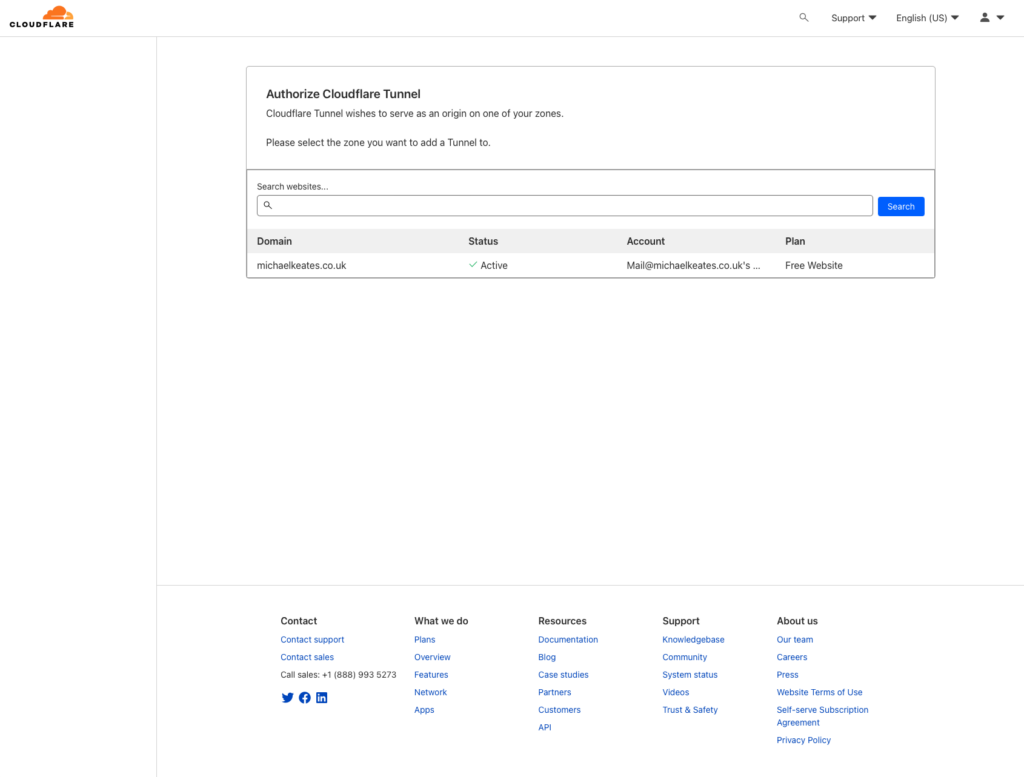

If you see the following message below, the Cloudflare service has successfully been authenticated. Obviously ‘USER’ is the username you created when the image was flashed to the SD card.
You have successfully logged in.
If you wish to copy your credentials to a server, they have been saved to:
/home/USER/.cloudflared/cert.pem
Before creating a tunnel to have the services routed from the Raspberry Pi, Part 2 will go through the process of installing Docker onto the Pi as fundenmentaly the tunnel will need to reach a service which will be done in the future.