
Part 3 – Portainer

As University is finally finished, it was time to redo my current setup to start from scratch. Currently my Raspberry Pi isn’t doing much at the moment except running a few docker containers such as Vaultwarden while my main unRaid server is running the bulk of the services I need. So it was time to offload some of the services onto the Raspberry Pi, especially ones that I need to access when the main server is offline.
The unRaid server is hosting a ‘cloudflared’ container so that it enables myself to access my services such as NextCloud through a tunnelling service, commonly known as a ‘Argo Tunnel’. This should prefebly run on the Raspberry Pi as that would be running 24/7 and always have access to my services unlike the current setup where I lose my password manager and SearchXNG when the system is down.
Also, the unRaid system is running a Home Assistant VM with HACS installed which again would be better running on a Raspberry Pi so it is always online and have my automations working.
It is time to follow part 3 of this tutorial series!
Tutorial
Installing Portainer
Again as always, it is a good practice to update all the existing packages.
sudo apt update
sudo apt upgrade
Configuring your User for Docker
We can utilise Docker once it has been set up and configured to install Portainer on our Raspberry Pi. We can pull the most recent version of Portainer using the following command since it is accessible as a Docker container on the official Docker hub.
sudo docker pull portainer/portainer-ce:latestWe may now launch the Portainer image on your Raspberry Pi after Docker has finished downloading it. We need to provide a few extra arguments to tell Docker to run this container. Run the following command to launch Portainer in your Pi’s terminal.
sudo docker run -d -p 9000:9000 --name=portainer --restart=always -v /var/run/docker.sock:/var/run/docker.sock -v portainer_data:/data portainer/portainer-ce:latestThen replacing the ‘IPADDRESS’ with what your Pi’s IP address followed by the port number, you can access the web gui of Portainer.
http://IPADDRESS:9000Installing NGINX Proxy Manager
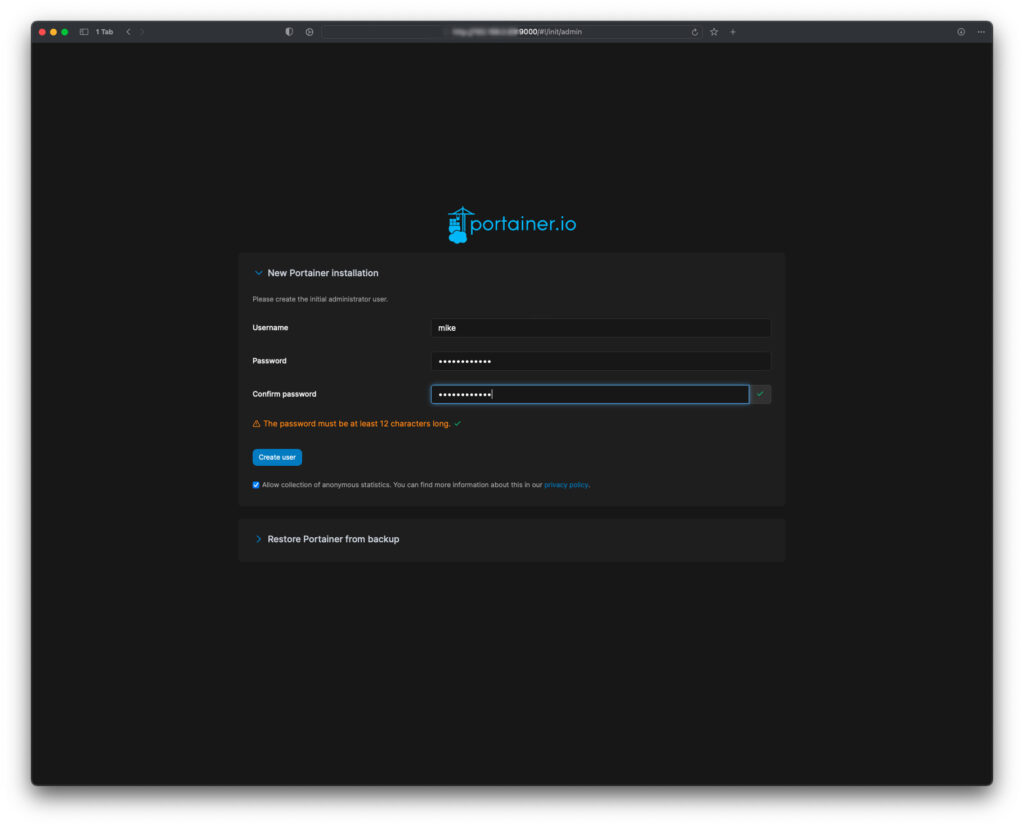
You will need to set up a new admin account with Portainer.
The next step is to create a new container for NGINX Proxy Manager, to do this go to the Containers page and click on ‘+ Add container’.
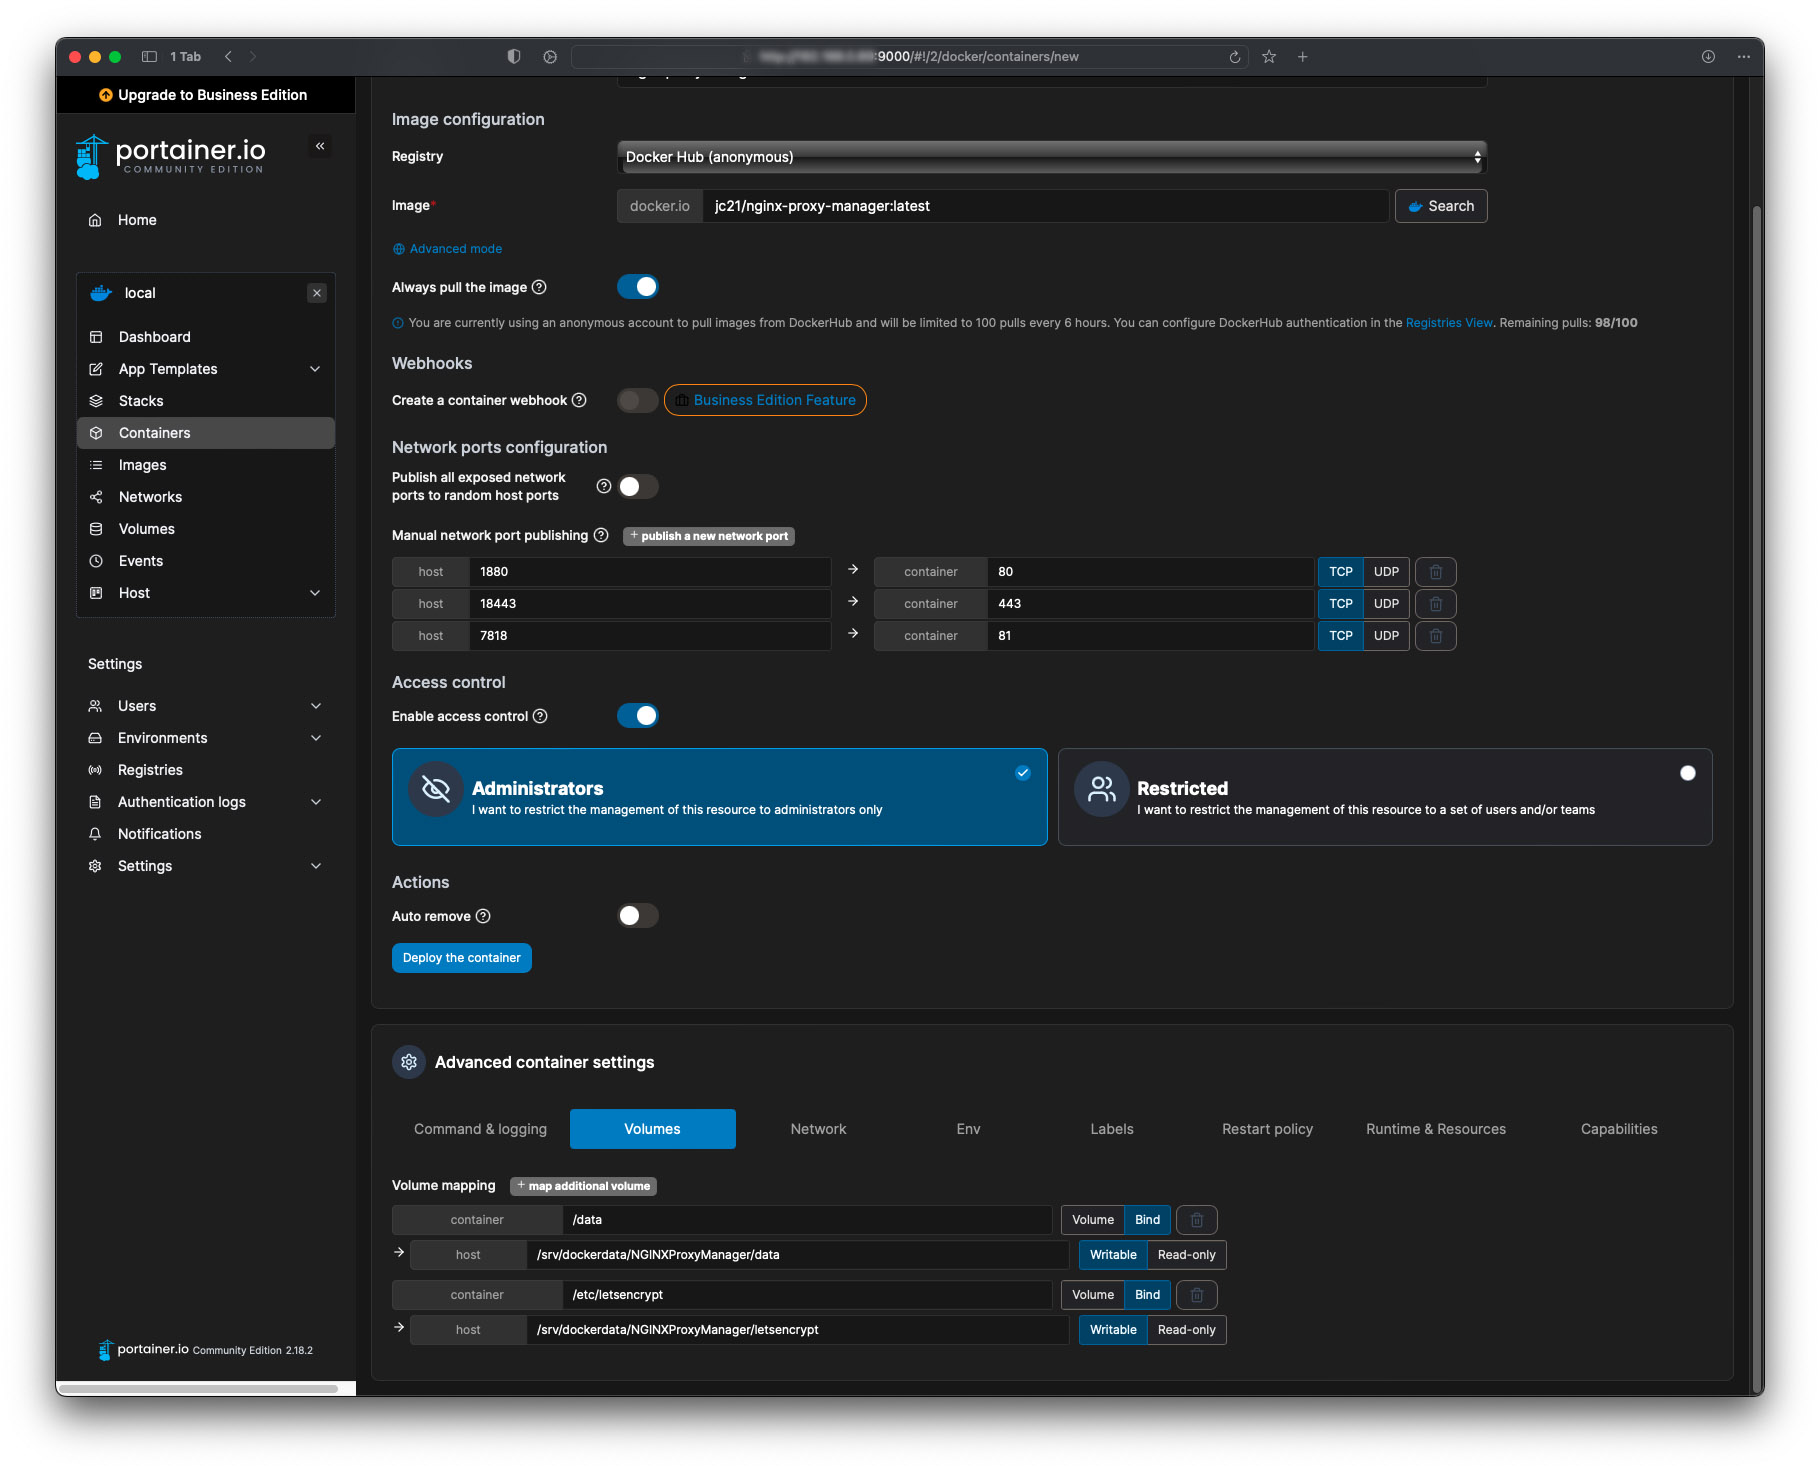
Will need to click on the ‘+ publish a new network port’ three times and input the port numbers above. The numbers on the left can be anything you want, while the numbers on the right are what the container requires for the proxy manager to work correctly.
The next step is to click on ‘Volumes’ below and click on the ‘+ map additional volume’ button three times as proxy manager needs a folder for ‘data’ as well as ‘letsencrypt’ to save the certificates.
To create the directories, head back to your terminal and input the following code to temporaly give you root access.
sudo suThen input the following commands, you can change any of the directory folder names or location to your preference. This is just where the NGINX Proxy Manager will store its data on the Raspberry Pi.
mkdir /srv/dockerdata/NGINXProxyManager/data
mkdir /srv/dockerdata/NGINXProxyManager/letsencrypt
Then back to Portainer, under Volumes for each mapping, you’ll need to click on ‘Bind’. Under the first container mapping type in ‘/data’ and below in the host section input ‘/srv/dockerdata/NGINXProxyManager/data’ or where you created the directories from earlier.
Below that in the container section in the next volume mapping type in ‘/etc/letsencrypt’ and below that ‘/srv/dockerdata/NGINXProxyManager/letsencrypt’ or again, whatever you set the directory to.
Then above click on ‘Deploy the container’ to pull the image. Then once it has downloaded the image and been deployed, go the Pi’s Address and the port number to access the GUI.
http://IPADDRESS:7817Then you should be taken to the login page for the NGINX Proxy Manager container. To login you will need to input the following values.
Email Address: [email protected]
Password: changeme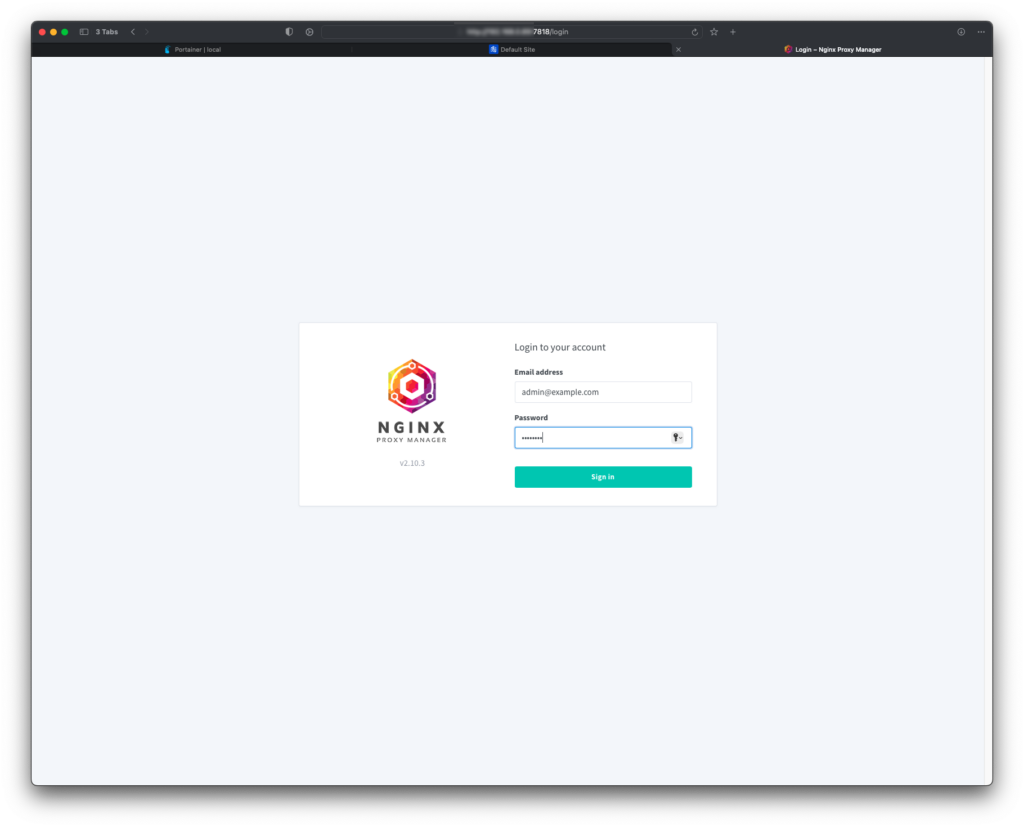
After that, you will be taken to the main page after changing login details. It is now time to follow Part 4 of the tutorial series to have Cloudflared be able to access the Proxy Manager through a tunnel.